This will guide you on how to set up multiple domains under the same host using Go Daddy. I prefer Go Daddy as it is a webhost and domain provider with great pricing and service. The below steps could work with other providers, however the host manager may look different and steps would differ.
1. First step is to buy web hosting with unlimited websites featured. My preference is Go Daddy.
Example:
2. You then need to buy domain/s. At the moment I have 3 under my webhost with Go Daddy (and counting!) Domains are very affordable and I like to keep everything in the same place for convenience.
Example:
3. Set up your file manager with a folder to place your domains in.
In Go Daddy, once you launch your webhosting, click on "File Manager".
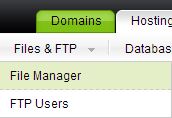 |
| Accessing File Manager |
In File Manager, create a folder where you will have all your different websites under. I place all of mine under "_sites".
 |
| Adding folder in File Manager |
4. Add a subfolder in your "_sites" folder (or equivalent) with the name of your domain (e.g., /_sites/domain). This is where your website will be set up.
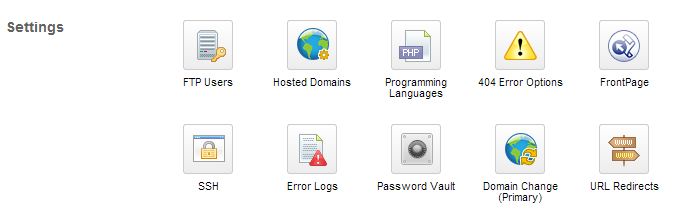
5. Go to your hosting manager.

Under "Settings", click on "Hosted Domains".
 then start writing your domain under "Domain" and choose the folder you created in Step 4 under "Folder". You can either write this in or browse it. I have used "domain.com" as an example (I do not own that domain).
7. Your new domain will now appear in your list with "pending". This will then change to "Setup" within the hour.

8. When the status changes to "Setup" you can then start building the website within your domain folder (in File Manager).
----------------------
I like using Wordpress as my database instead of creating a whole website from scratch. View below for instructions on how to set up Wordpress in your new domain. You can also view more information here.
To install wordpress, go to wordpress.org and download wordpress to your computer. Next, upload the extracted files into your domain folder (e.g., /_sites/domain).
If you prefer another database or website construction, then visit the relevant database website and follow their manual set up instructions.
9. Set up a new SQL Database. This is so all the domains you have are set up under separate databases to avoid conflict. This is important! You will have a new Host Name for each domain under the same host.

Under "Hosting" and "Databases", click on MySQL. Add a new database using your domain's details. Create a password so you can access the database. I use my domain name as the Friendly name and Username.


You will get a message that says that the database is being set up. Your new database will appear shortly (you may need to revisit the screen again).
10. You then need to add your SQL database details into the website database you have chosen. Below are instructions for Wordpress.
In your browser, write in your domain in the URL box (e.g., domain.com). If you placed all your wordpress files into the correct folder, you will be presented with this.

Click on "Create a Configuration File".
Enter the details you wrote when you created the SQL Database. Under Hostname, do the following:


Your wp_config file will then be created under your domain. You can then follow the steps to set up your Wordpress website.
---------------------------
Please note: These instructions are for when you want to add extra domains under the same webhost. If you only have one domain in one webhost and not planning on having any more domains, then these instructions are not for you. Set up your website using normal methods (install files in your root folder).
If you have any questions, let me know and I'll do my best to answer them. I am by no means a professional in this. I created this because I could not find all of the above under one article. Most articles left some important steps out I had to figure out myself (or assumed the knowledge). In truth, I mainly created this so I can look back on it if I forget how to do it again. Yes, my memory is that horrible.
No comments:
Post a Comment